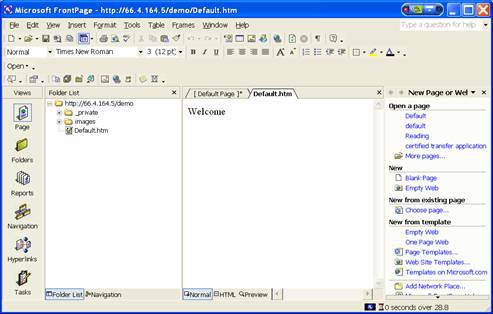
Creating a FrontPage Website
3.
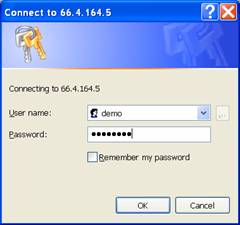
Login to your Website
4.
A username and password will be provided by the
Instructor.
|
|
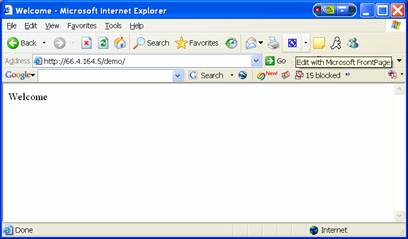
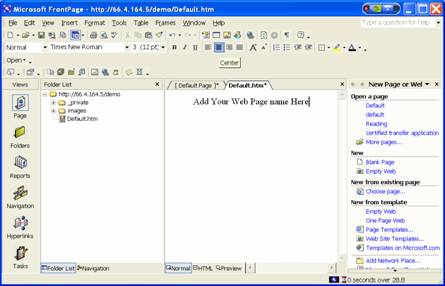
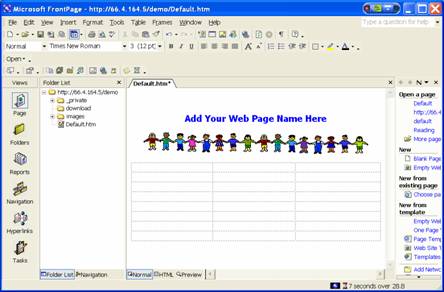
5.
This is what the opened Web Page looks like.
|
|
6.
Add Text to the Default.htm page.
|
|
7.
Left Click and Drag the Cursor Across the text.
8.
Pick the Font Style and Color.
|
|

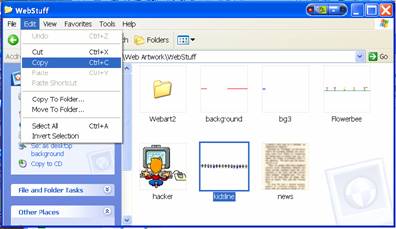
9.
From a known location, choose a graphic image to insert
into your default page.
10.
Use “Copy” and “Paste”
|
|
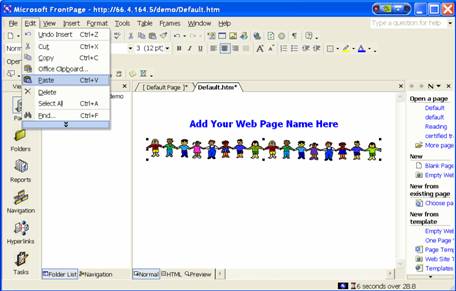
11.
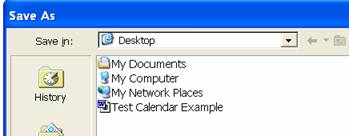
This is an example of the “pasted” image.
|
|
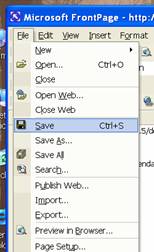
12.
This is a good time to save your work.
13.
Go to “File”, then “Save”
|
|

14.
You will be prompted to upload the image from your
computer to the Web Server.
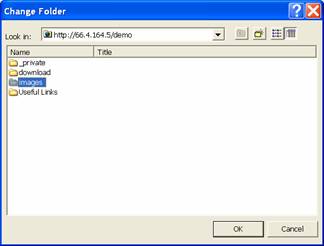
15.
Click on “Change Folder”
|
|
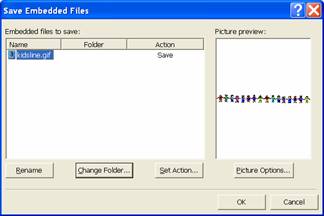
16.
Choose the “images” folder
17.
Click on “OK”
|
|
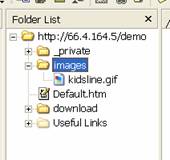
18.
Look In your “Folder List” to see if the image
appears below the folder called “Images”.
|
|
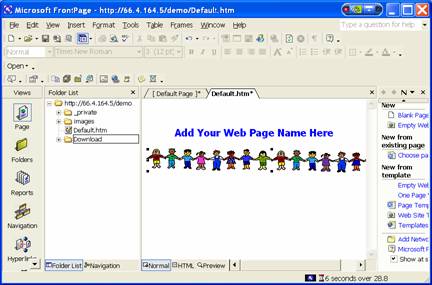
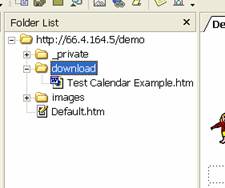
19.
Create a “New Folder” in your “Folder List”. This
is called the Root Web.
|
|
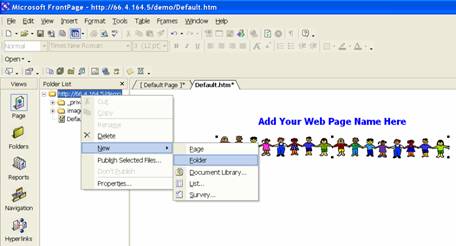
20.
Name the new folder “Download”.
|
|
21.
Now, we need to create a table on the “Default”
page for Hyperlinks.
|
|
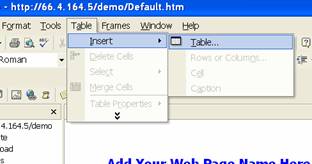
22.
Enter the number of Rows and Columns.
23.
Set the Alignment to Center.
24.
Set the Boarder size to 0.
|
|

25.
Notice the Rows and Columns
|
|
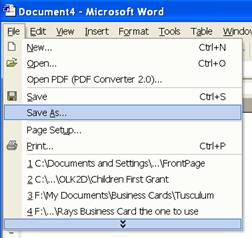
26.
At this point open Microsoft Word and create a word
document so that you may upload the document to the “Download” folder on
your Website.
27.
Then Choose Save or Save As…
|
|
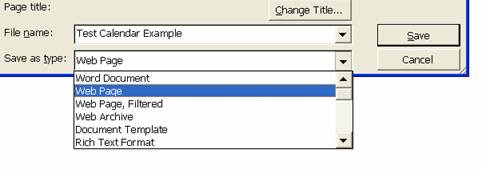
28.
Under “File name” type in the name of your
document.
29.
Under “Save as type” Choose “Web Page”
30.
Then save the document at a known location, i.e.
“Desktop”
31.
Remember to click on the “Save” button
|
|
32.
The Icon will appear on your Desktop.
|
|

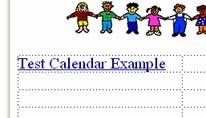
34.
Right click on the “Test Calendar Example” icon,
located on your Desktop, continue to hold the mouse button down, and drag
the icon over into your download folder on the Web Server.
|
|

35.
If done correctly, the document will appear in the
download folder.
|
|
36.
In the FrontPage Editor, type in the name of the
“Hyperlink” that you wish to create within your table.
37.
Highlight the text
38.
Place the cursor over the highlighted text
39.
Right Click and Scroll down to Hyperlink… and Left
Click
|
|

40.
Double Click the “Download” folder
|
|
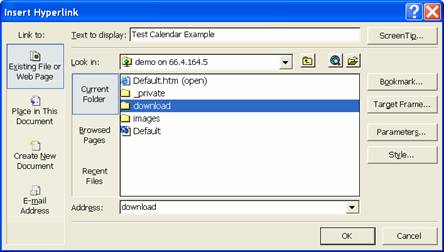
41.
Double Click the “Test Calendar Example”
|
|
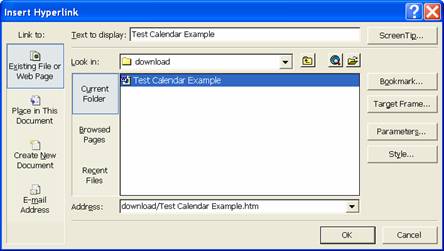
42.
If done correctly, the Hyperlink will appear underlined.
|
|
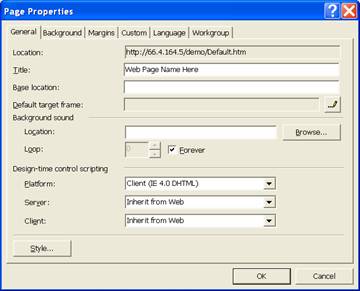
Setting Page Properties
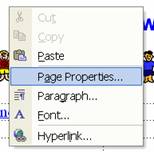
43.
Right Click in the background of your FrontPage
Editor
44.
Scroll down and click on “Page Properties”
|
|
45.
Under the “General” tab…
46.
Name the page Title: Web Page Name Here
|
|
47.
Under the “Background” tab
48.
Choose Background: white
49.
Choose your Hyperlink Colors
|
|
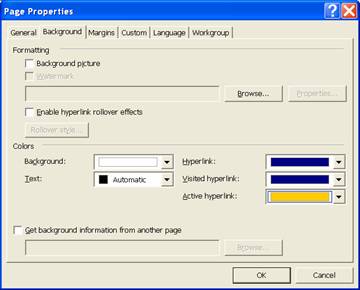
50.
You may also choose additional colors.
|
|

51.
Remember to “Save” your work
|
|